

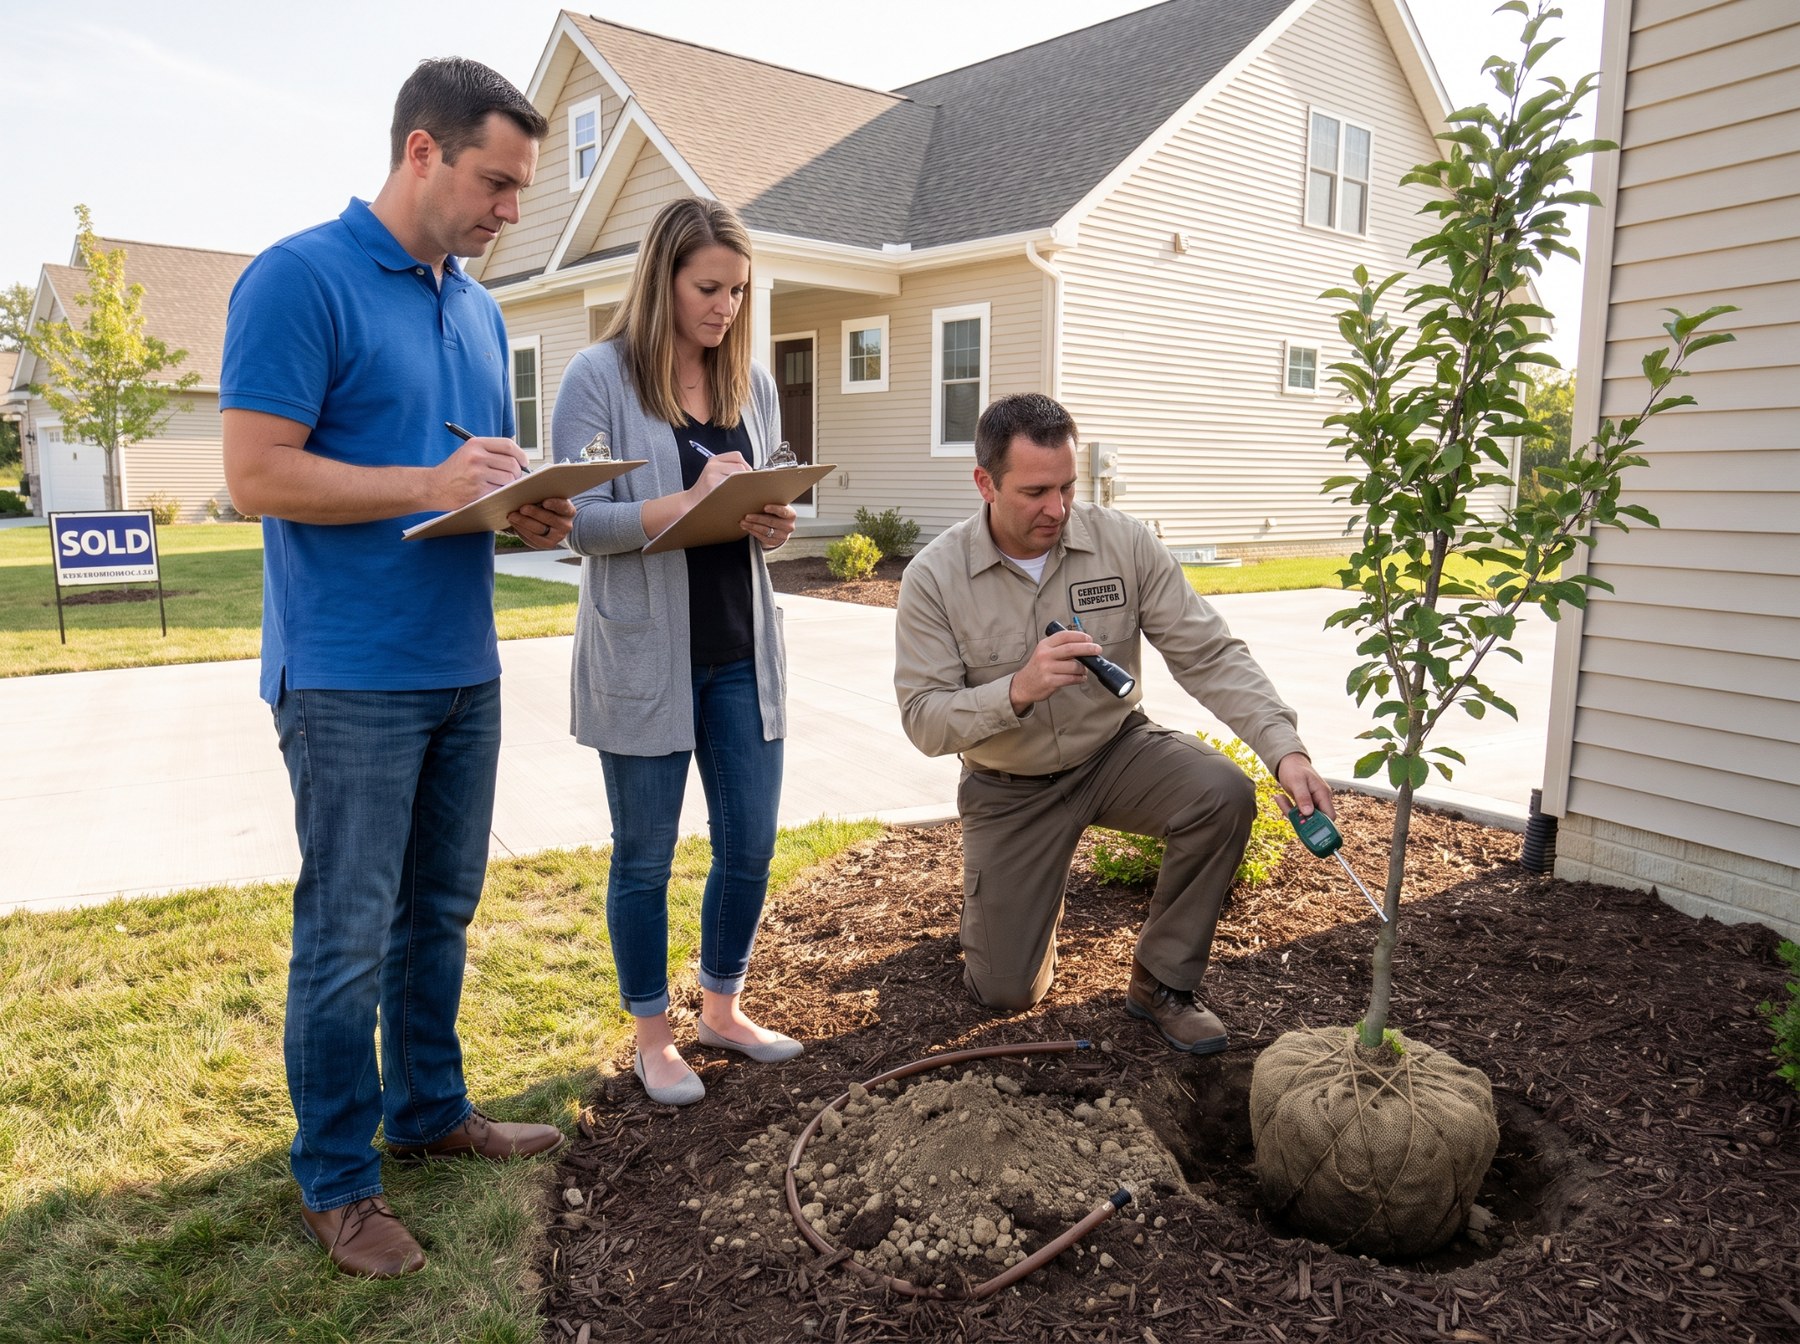
Ensure a Smooth Closing: Essential Final Walk-Through Tips
As you approach the closing day, it’s crucial to conduct a meticulous final walk-through to confirm that the property is exactly as agreed upon and no new issues have arisen. This final inspection helps identify repairs, landscaping risks, and other discrepancies before closing...

Hidden Threats Behind Historic Plaster and Lath Walls: Revealing Termite Damage
Historic homes often boast the charm and character of plaster and lath walls, but these features can mask serious underlying issues. Termite damage within these walls remains a silent threat, making advanced inspection methods essential...

Choosing and Caring for Wood in Challenging Environments
When termites and fungi both pose threats to wooden structures, selecting the right wood species and implementing proper maintenance strategies become essential to ensure long-lasting durability...
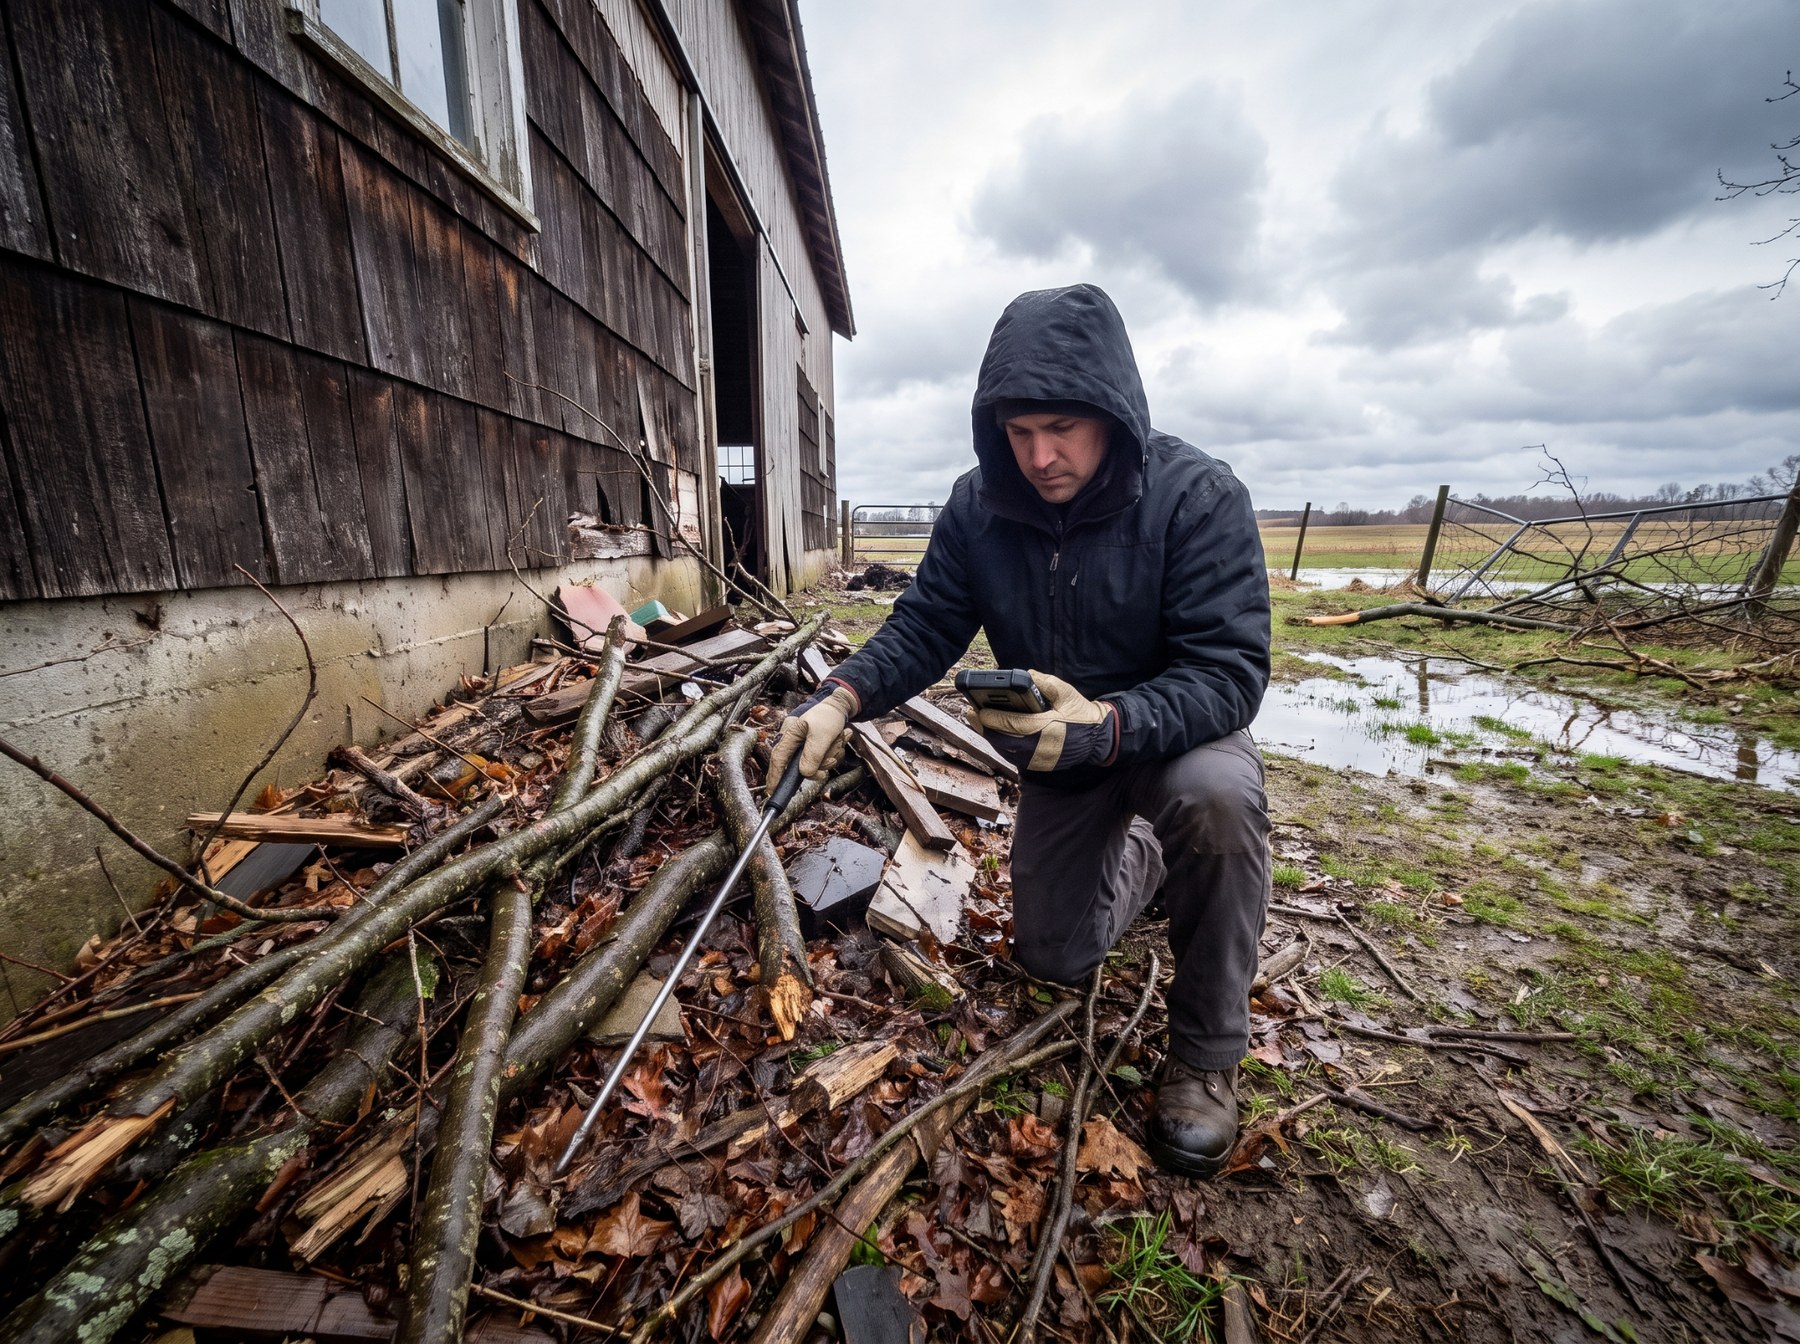
Essential Post-Storm Inspections: Preventing Hidden Moisture and Debris Hazards
After a storm passes, the immediate damage is often obvious, but subtle threats like moisture intrusion and accumulated debris can quietly worsen conditions if not addressed promptly...

Strategic Pest Defense: Crafting a Unified Termite Prevention Approach
Termite management requires more than isolated actions; it demands a harmonized strategy that blends cultural, mechanical, and chemical techniques to safeguard structures effectively...
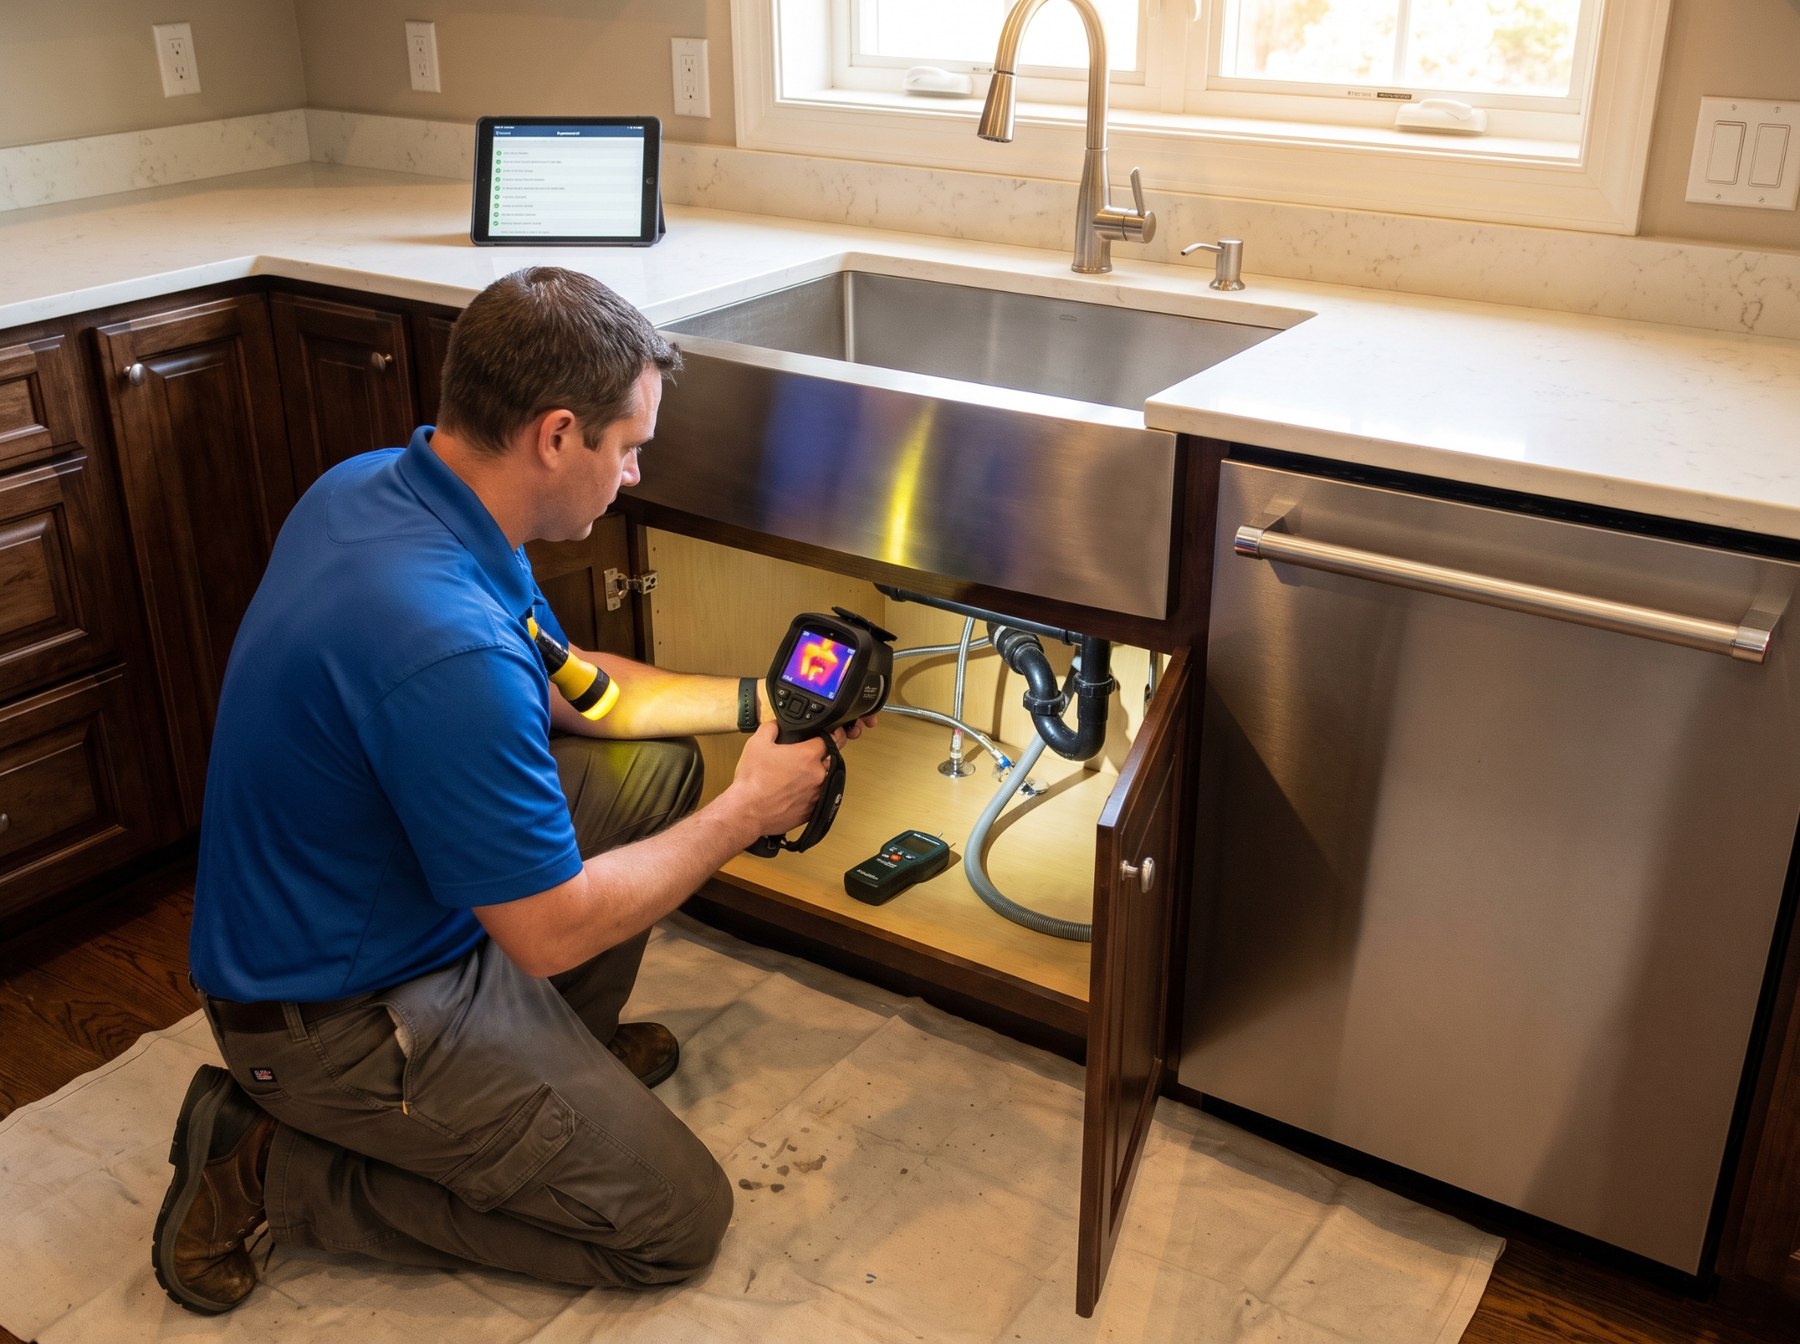
Prevent Hidden Water Damage: Stay Ahead of Kitchen Sink and Dishwasher Leaks
When it comes to kitchen maintenance, tiny drips around sink cabinets and dishwasher lines might seem harmless, but they can silently cause extensive dampness over time. These slow leaks promote mold growth, wood warping, and structural weakening that may lead to costly repairs if unnoticed...
Ensure a Smooth Closing: Essential Final Walk-Through Tips
As you approach the closing day, it’s crucial to conduct a meticulous final walk-through to confirm that the property is exactly as agreed upon and no new issues have arisen. While last-minute landscaping or repair efforts can enhance curb appeal and functionality, they may inadvertently introduce fresh risks or defects that could affect your investment. This final inspection ensures you leave no stone unturned before signing those closing documents.
Focus on verifying that all repairs promised by the seller are completed to your satisfaction and that no new damages have been caused during recent work. Pay special attention to landscaping changes – freshly planted trees or shrubs might have disturbed irrigation lines or created drainage problems. Similarly, cosmetic touch-ups should not mask structural concerns or hidden damage.
To make your walk-through efficient and thorough, consider a checklist that covers critical areas such as plumbing, electrical systems, windows, doors, and exterior grounds. If possible, bring along any professional inspection reports for reference. Remember, this is your last opportunity to identify and address discrepancies before ownership is transferred.
By carefully reviewing the property’s condition and confirming that no new hazards have been introduced, you protect yourself from unexpected costs and delays. Taking the time for a comprehensive final walk-through empowers you with confidence as you move into your new home.
Spotting Risks in Last-Minute Landscaping Changes
Landscaping improvements can dramatically increase a home’s appeal, but last-minute changes might conceal hidden risks. Newly installed irrigation systems or plantings may disrupt existing underground utilities or cause water pooling issues. It’s important to inspect these elements carefully during your final walk-through to ensure nothing compromises the property’s integrity.
Check for uneven soil, exposed roots, or signs of erosion that could lead to foundation challenges later. Confirm that walkways and driveways remain stable and free of cracks or shifting caused by recent work. Don’t hesitate to ask for documentation or warranties relating to landscaping updates so you can verify their quality and longevity.
Verifying Repairs Completed Before Closing
One of the most critical aspects of your final inspection is ensuring all agreed-upon repairs have been properly addressed. This includes visible fixes like patching drywall, repainting, or replacing broken fixtures, as well as less obvious repairs such as electrical or plumbing corrections.
Use a detailed list of negotiated repairs to cross-reference during your walk-through. Test faucets, outlets, and appliances included in the sale to confirm functionality. If any items appear incomplete or substandard, document them immediately and communicate your concerns to your agent or attorney before closing.
Creating a Final Walk-Through Checklist for Peace of Mind
A well-structured checklist is your best tool to stay organized and thorough during the final walk-through. Include categories covering interior elements like doors, windows, HVAC systems, and safety features, as well as exterior components such as roofing, gutters, and landscaping.
Bring any prior inspection reports and compare notes to identify new issues. Take photos or videos to document the property’s condition on closing day. This proactive approach helps you avoid surprises and facilitates smooth communication with the seller if discrepancies arise.

Hidden Threats Behind Historic Plaster and Lath Walls: Revealing Termite Damage
Historic homes often boast the charm and character of plaster and lath walls, but these features can mask serious underlying issues. Termite damage within these walls remains a silent threat, as the dense layers of plaster and wood lath can conceal the extent of infestation. Traditional visual inspections frequently fall short, leaving homeowners unaware of the losses hidden beneath intact surfaces.
Advanced diagnostic methods such as borescope inspections and careful probing provide a window into these concealed areas. By inserting a slender camera or gently probing suspect sections, professionals can detect hollow spots, cracks, or tunnels that signal termite activity. This approach is essential because termite damage often starts internally, weakening the structure without obvious external signs.
Understanding the limitations of surface-level checks is critical to preserving the integrity of historic buildings. Early detection through borescope and probing not only prevents costly repairs but also safeguards the home's architectural heritage. Homeowners and inspectors should prioritize these specialized techniques to ensure that hidden termite losses are accurately identified and addressed before escalating.
Why Traditional Inspections Miss Termite Damage in Plaster and Lath Walls
Plaster and lath walls are composed of multiple layers that create a solid exterior, making it challenging to detect termite damage through casual observation. Termites often tunnel behind the plaster, consuming the wood lath from the inside out. This concealed activity leaves minimal surface evidence, allowing infestations to progress unnoticed.
Visual inspections usually focus on visible signs such as frass, mud tubes, or damaged wood, but these indicators may not appear on the plaster surface. Without invasive methods, inspectors cannot thoroughly assess what lies beneath the layers. Consequently, infestations may remain hidden until structural damage becomes severe and visible, complicating repairs and increasing costs.
Utilizing borescope technology allows inspectors to peer behind plaster walls without causing significant damage. This non-destructive technique, combined with strategic probing, uncovers termite galleries and weakened wood early. Detecting infestations at this stage is crucial for effective treatment planning and preserving the home's structural integrity.
How Borescope Inspections Enhance Termite Detection in Historic Homes
Borescope inspections provide a minimally invasive solution tailored to the challenges of historic plaster and lath walls. This method involves inserting a thin, flexible camera through small access points to visually inspect internal wall cavities. The high-resolution imagery reveals termite tunnels, damaged wood, and moisture issues that contribute to pest attraction.
Unlike traditional probing alone, borescopes allow precise targeting of suspicious areas, reducing the need for extensive wall openings. This precision is vital when working with delicate, irreplaceable materials found in older homes. Inspectors can document findings instantly and guide homeowners on necessary remediation steps.
Integrating borescope technology with probing creates a comprehensive diagnostic approach. Probing confirms the presence of compromised wood while the camera captures visual proof, enabling accurate assessment. This synergy helps ensure no termite damage goes undetected, protecting the unique craftsmanship of historic residences.
Best Practices for Preserving Historic Walls While Detecting Termite Damage
Preservation of historic plaster and lath walls demands careful inspection methods that minimize disruption. When termite damage is suspected, early intervention using borescope and probing techniques is essential to balance thorough investigation with conservation.
Inspectors should focus on identifying vulnerable areas such as baseboards, window frames, and corners where moisture and termites often concentrate. Employing small access points for borescope insertion helps maintain the wall's visual and structural integrity.
Homeowners can support preservation efforts by scheduling regular professional inspections that utilize these advanced tools. Prompt detection enables targeted treatments that reduce chemical exposure and extensive repairs, safeguarding both the home's history and its inhabitants. Collaborating with specialists familiar with historic structures ensures the best outcomes for termite management and wall preservation.
Choosing and Caring for Wood in Challenging Environments
When termites and fungi both pose threats to wooden structures, selecting the right wood species and implementing proper maintenance strategies become essential to ensure long-lasting durability. Different wood species possess varying natural defenses that can significantly reduce the risk of damage in such environments. Understanding these characteristics helps in making informed choices that protect investments and extend the lifecycle of wood installations.
Wood species with inherent resistance to biological threats often contain natural oils and resins that deter pests and inhibit fungal growth. Examples include certain tropical hardwoods and treated softwoods that maintain structural integrity even in damp or termite-prone areas. However, even resistant woods require ongoing care to preserve their protective qualities.
Maintenance practices such as regular inspections, moisture control, and protective coatings are critical components of a comprehensive defense strategy. Moisture is a key factor in fungal development, so managing humidity levels around wooden elements dramatically reduces decay risk. Additionally, routine cleaning and sealing prevent surface deterioration and block pest access.
By combining intelligent wood selection with vigilant upkeep, homeowners and builders can create resilient wooden structures that endure in environments where termites and fungi coexist. Investing time and resources upfront ensures peace of mind and minimizes costly repairs over time.
Selecting Wood Species with Natural Defenses
Choosing wood species that naturally deter termites and fungi is a proactive step in protecting wooden structures. Woods like teak, ipe, and redwood contain compounds that are toxic or unpalatable to these organisms. These species also tend to have dense grain structures that limit moisture penetration, making them less hospitable to fungal growth.
Softwoods such as cedar and cypress possess natural preservatives that provide moderate resistance, especially when combined with modern treatment methods. Selecting wood based on environmental exposure and specific pest pressures leads to better performance and durability. Always consider local climate and typical pest activity when making your selection to maximize effectiveness.
Effective Maintenance Techniques to Enhance Longevity
Maintaining wood in areas vulnerable to termites and fungi requires a multifaceted approach. Regular inspections to detect early signs of infestation or decay allow for prompt intervention before significant damage occurs. Proper ventilation and drainage minimize moisture accumulation, which is critical since damp conditions accelerate fungal growth and attract termites.
Applying protective finishes such as sealants or stains creates barriers that limit moisture ingress and pest access. These coatings should be reapplied periodically according to product guidelines. Additionally, minimizing soil contact and clearing debris near wood surfaces reduce pest harborage and fungal spores, enhancing structural longevity.
Integrating Prevention for Optimal Wood Durability
Combining species selection with consistent maintenance forms a comprehensive defense against termite and fungal threats. Integrating physical barriers, such as metal shields or treated membranes, further reduces pest entry points. Employing environmentally responsible chemical treatments can also provide targeted protection without compromising wood quality.
Education on proper installation techniques ensures that wood is positioned and fastened to discourage pest colonization. Monitoring environmental conditions and adapting maintenance schedules accordingly ensures that preventive measures remain effective as seasons and climates change. This holistic approach maximizes wood durability in challenging environments.
Essential Post-Storm Inspections: Preventing Hidden Moisture and Debris Hazards
After a storm passes, the immediate damage is often obvious, but subtle threats like moisture intrusion and accumulated debris can quietly worsen conditions if not addressed promptly. Moisture that enters walls, attics, or crawl spaces creates an ideal environment for mold and pest colonies, accelerating their growth and complicating repairs. Debris piles, such as twigs, leaves, and construction remnants, not only trap moisture but also provide shelter for insects and rodents seeking refuge from the elements.
Comprehensive post-storm inspections focus on identifying these concealed problems before they escalate. Inspectors look for signs such as damp insulation, darkened wood, or unusual odors that indicate water penetration. They also assess debris accumulation around foundations, gutters, and vents, as these areas are prone to trapping materials that can obstruct airflow and drainage.
Key areas to prioritize during inspections include:
- Roof valleys and shingles where water can pool unnoticed.
- Basements and crawl spaces vulnerable to flooding or seepage.
- Exterior vents and drainage channels that may harbor debris.
- Tree limbs and organic matter resting against the structure.
By addressing these issues immediately, property owners can prevent costly infestations and structural damage, preserving both health and property value. Engaging professional inspection services ensures thorough evaluation and timely intervention. These experts bring specialized knowledge and tools to detect hidden moisture pockets and safely remove hazardous debris. Scheduling inspections soon after storms is a proactive step in safeguarding any property from the lingering effects of moisture intrusion and pest colony expansion.
Detecting Moisture Intrusion Early
Moisture intrusion often goes unnoticed until its effects become severe. Early detection is critical to halting damage before it spreads. Inspectors use moisture meters and thermal imaging to locate damp areas inside walls and ceilings that are not visible to the naked eye. These tools reveal hidden leaks behind drywall or under flooring that could cause mold growth or wood rot if left untreated.
Regular monitoring after storms helps track moisture levels and identify problem zones quickly. Homeowners should be aware of signs such as peeling paint, warped surfaces, or musty smells, which indicate underlying water issues. Prompt remediation of these areas prevents the development of larger colonies of mold or pests attracted by the damp environment.
Managing Debris to Reduce Pest Shelter
Storms leave behind more than just water damage; piles of debris accumulate around properties, creating perfect nesting spots for pests. Leaves, branches, and construction materials can collect near foundations, under porches, and inside gutters. These debris piles retain moisture and shield insects and rodents from detection, encouraging their rapid growth.
Routine cleanup after a storm is essential to disrupt these habitats. Clearing gutters, trimming back vegetation, and removing organic matter from around the building limits shelter and breeding grounds. Additionally, debris removal improves ventilation and drainage, reducing moisture buildup that attracts unwanted guests.
Why Professional Post-Storm Inspections Matter
While property owners can perform basic checks, professional inspectors provide comprehensive evaluations that uncover hidden risks. Their expertise includes identifying subtle signs of moisture intrusion and debris accumulation often missed by the untrained eye. They also recommend effective mitigation strategies tailored to each property’s specific vulnerabilities.
Engaging professionals after storms accelerates intervention, minimizing damage and associated repair costs. Their inspections help maintain a healthy environment by preventing mold outbreaks and pest infestations that could threaten occupant safety. Investing in expert assessments promotes long-term resilience and peace of mind.
Strategic Pest Defense: Crafting a Unified Termite Prevention Approach
Termite management requires more than isolated actions; it demands a harmonized strategy that blends cultural, mechanical, and chemical techniques to safeguard structures effectively. Integrated Pest Management (IPM) transforms termite prevention into a proactive, coordinated plan that minimizes damage while promoting sustainability.
At its core, IPM emphasizes understanding termite behavior and environmental factors to tailor interventions. Cultural methods such as maintaining proper moisture levels and removing wood debris reduce termite attraction. Mechanical tactics, including physical barriers and structural modifications, create robust defenses that impede termite access. Chemical applications act as a last line of protection, applied carefully to minimize environmental impact.
Employing this triad approach fosters a resilient defense system, balancing prevention and control without excessive reliance on chemicals. This not only enhances long-term efficacy but also supports safe living and working environments.
By integrating these tactics into a unified termite prevention plan, property owners and pest professionals can anticipate challenges, respond swiftly, and maintain structural integrity more efficiently. The IPM framework encourages ongoing monitoring and adaptation, ensuring termite threats are managed thoughtfully and effectively over time.
Cultural Controls: Shaping the Environment Against Termites
Cultural control methods form the foundation of termite prevention by altering the surroundings to discourage infestation. These approaches focus on environmental management and maintenance practices that reduce termite-friendly conditions.
Key cultural strategies include removing or reducing wood-to-soil contact, eliminating excess moisture around foundations, and managing vegetation close to buildings. Ensuring proper drainage and promptly repairing leaks further diminish termite habitat suitability. These proactive steps limit termite access and nesting opportunities, making properties less vulnerable.
By prioritizing environmental modifications, cultural controls not only prevent infestations but also reduce the need for chemical treatments, aligning with sustainable pest management principles.
Mechanical Barriers: Physical Solutions to Block Termite Entry
Mechanical tactics in termite prevention involve installing physical barriers that obstruct termite movement into structures. These barriers are critical components of an integrated approach, providing long-lasting protection without chemicals.
Examples include stainless steel mesh, sand barriers, and specially designed shields that termites cannot penetrate. During construction or renovation, incorporating termite-resistant materials and sealing entry points strengthens defenses. Mechanical barriers complement cultural controls by reinforcing the physical integrity of the building.
These measures not only deter termites but also allow for early detection and easier management, enhancing overall protection and reducing repair costs.
Targeted Chemical Treatments: Precision in Termite Control
Chemical tactics in termite management serve as a precise tool when cultural and mechanical methods alone cannot fully prevent termite activity. The key is targeted application, minimizing chemical use while maximizing effectiveness.
Termiticides are applied in soil treatments, bait systems, or localized injections to create a protective zone around structures. This approach disrupts termite colonies and limits their spread. Careful selection of chemicals and adherence to safety protocols ensure environmental responsibility and occupant health.
Combined with monitoring and maintenance, targeted chemical use completes the IPM cycle, offering a balanced and adaptive method to keep termite threats at bay.
Prevent Hidden Water Damage: Stay Ahead of Kitchen Sink and Dishwasher Leaks
When it comes to kitchen maintenance, tiny drips around sink cabinets and dishwasher lines might seem harmless, but they can silently cause extensive dampness over time. These slow leaks promote mold growth, wood warping, and structural weakening that may lead to costly repairs if unnoticed. Regular vigilance is essential to protect your kitchen’s integrity and ensure a healthy indoor environment.
Many homeowners overlook the subtle signs of moisture build-up beneath sink cabinets. The area often stays dark and enclosed, creating an ideal environment for water accumulation to go undetected. Dishwasher hose connections are another common source of leaks, especially when fittings loosen or hoses degrade with age. By routinely inspecting these areas, you can catch minor issues before they escalate.
Adopting a few simple habits helps maintain dryness and prevents long-term damage. For example, wiping down cabinet interiors after water use, checking hose clamps for tightness, and promptly addressing any damp odors can make a significant difference. Additionally, installing moisture sensors or using waterproof liners inside cabinets adds an extra layer of protection.
Being proactive not only preserves your kitchen’s appearance but also safeguards your investment. With consistent care and awareness, you can avoid the frustration and expense of hidden water damage. Remember, tiny drips today can lead to major problems tomorrow—so stay alert and keep your kitchen dry.
Spotting Early Signs of Leaks Under Kitchen Sinks
Early leak detection is critical to preventing extensive water damage beneath kitchen sinks. Look for discoloration or swelling on cabinet wood, a telltale indicator of moisture intrusion. Persistent musty smells or unexplained dampness inside the cabinet also signal potential leaks. Regular inspections every few weeks allow you to identify these subtle warning signs early.
Check plumbing connections carefully, including shutoff valves and drain fittings. Even a minor drip can accumulate over days, so gently touching pipes for moisture or corrosion helps pinpoint trouble spots. Using a flashlight to scan hard-to-see corners reveals hidden puddles or mold patches.
In addition to visual checks, placing a dry paper towel under pipes overnight can reveal slow leaks by showing wetness in the morning. Acting promptly upon these early signs prevents mold growth and costly repairs down the road.
Maintaining Dishwasher Supply Lines to Avoid Moisture Buildup
Dishwasher supply lines are a frequent source of unnoticed leaks that contribute to dampness in kitchen cabinets. Over time, flexible hoses can crack or fittings may loosen due to vibrations during cycles. Regular maintenance includes inspecting hoses for signs of wear, such as brittleness or bulging, and ensuring all connections are secure.
Replacing supply lines every 5 years or sooner if damage is apparent reduces risk. Opting for stainless steel braided hoses offers added durability compared to rubber alternatives. Additionally, positioning hoses to avoid kinks or sharp bends prevents stress points that can cause failures.
Routine dishwasher cleaning and running water through the supply line periodically helps maintain smooth operation and reduces the chance of hidden leaks. Combining these practices with vigilant monitoring ensures your dishwasher area stays dry and damage-free.
Practical Tips to Protect Your Cabinets from Long-Term Water Damage
Protecting kitchen cabinets from water damage requires a combination of preventive measures and prompt responses. Start by installing waterproof liners or trays beneath sinks to catch drips before they reach wood surfaces. These liners are inexpensive and easy to replace, providing a critical moisture barrier.
Next, improve ventilation under the sink by leaving cabinet doors slightly ajar after water use or installing small vent openings. This helps moisture evaporate quickly, reducing the chance of mold growth. Avoid storing absorbent materials like cardboard or fabrics inside cabinets where leaks may occur.
Finally, incorporate moisture detectors that alert you to leaks early, allowing for immediate action. Together, these practical steps create a resilient kitchen environment, minimizing long-term dampness damage and maintaining cabinet integrity.